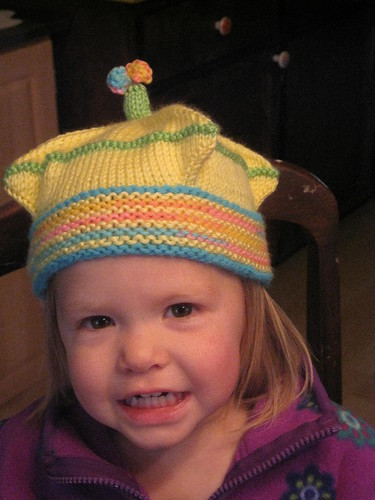
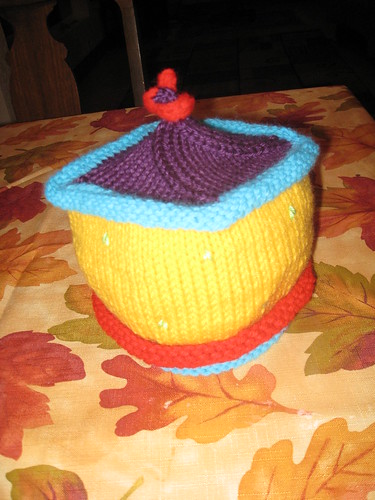
Showing posts with label knitting. Show all posts

Wednesday, August 10, 2011

Is There Anything to Say Other Than "Sorry"?

My daughter's idea for the title...since I have been so lax at updating this site. It's really not that turning 40 got me into a slump, funk, or anything like that. It's just the usual busy-ness of summer, including but not limited to, a whopping 7000 mile cross-country road trip in the van with 4 kids! (Yes, we had an awesome time, and we are all actually still on speaking terms after over 100 hours in the car.)

Anyways, onto the real motivation for posting: Sock Summit 2011!!! I feel so spoiled that SS was once again held in Portland...to the point of actually feeling a teensy bit guilty that we got to have such easy access to this fabulous event! Anyway, I spent far less this time around (seeing as I still have bags of yarn from SS 2009 that I haven't yet knit...that actually makes me feel even guiltier!). So, instead of shopping, I took two very cool classes.

The first was on Morphing Cables...this one I will admit was far beyond me. After explaining the "basics", the instructor told us to take it away and improvise. It was at that point that I realized all those people who flew across the country to attend SS were WAY better knitters than me, because I really didn't have a clue. But, it was still fun and the instructor was very entertaining.

The second class was on Textured Colorwork in the Bohus style and taught by Chrissy Gardiner. For those of you who aren't familiar with Bohus Stickning, you should just Google it and be prepared to drool over all of the amazing sweaters, hats, and other patterns from this cooperative. So, the class was really informative and at the end, I had my very own textured colorwork coffee cup wraps to show for it.


Next up, I'm thinking of something a bit more challenging, but not too crazy... At this point, I can't decide if I should follow a pattern or just make one up myself...

Saturday, January 8, 2011

Free Pattern: Wiggle Hat

When we were skiing last week, I saw a super cute hat in one of the ski shops. Wiggle Hat is my attempt to reconstruct it!


Materials Used:
Yarn: 135 yards (85 gm) Lion Brand Jiffy (or other Bulky 5 yarn)
Needles: Size US 10 / 4.25 mm 16” circulars and set of 5 US 10 DPNs
Tapestry Needle
Scissors

Size: 2T (17” circumference)
Note: Larger sizes can be made by increasing the number of cast on sts by multiples of 4.

Gauge: 14 sts = 4”
Abbreviations:
K: Knit
P: Purl
C4B: Cable 4 Back (Slip 2 sts to cable needle. Hold to back. K2, then K2 from cable needle.)
C4F: Cable 4 Front (Slip 2 sts to cable needle. Hold to front. K2, then K2 from cable needle.)
K2tog: Knit 2 together

Pattern:
Brim:
Using long-tail method (or other loose cast-on) CO 60. Join to work in round.
Work K1,P1 rib for 4 rounds.

Body:
Round 1: [C4B] around.
Round 2-4: K all sts.
Round 5: [C4F] around.
Round 6-8: K all sts.

Repeat Rounds 1-8 once more.
Then, work Round 1 one more time.

Crown:
Begin Decreases as follows (switching to DPNs when needed):
Place marker at beginning of round.
Round 1: [K4, K2tog] around. (50 sts)
Round 2: K around
Round 3: [K3, K2tog] around. (40 sts)
Round 4: K around.
Round 5: [K2, K2tog] around. (30 sts)
Round 6: K around.
Round 7: [K1, K2tog] around. (20 sts)
Round 8: K around
Round 9: [K2tog] around (10 sts]

Cut yarn (leaving 4-6”) pulling end tightly through remaining 10 sts. Weave in loose ends.

If desired, make large pom pom and tie to top.

Monday, December 6, 2010

Mom Can Make Anything

Ginny was pretending to whistle and blow on a flute yesterday... After awhile, it must have gotten old not actually *having* a flute, because Ginny asks, "Mom, can you knit me a flute? You can make anything!"

Sunday, November 14, 2010

Sweater of Many Colors

I finally finished Ginny's sweater adapted from my Honeycomb Waves Blanket pattern. It looks so cute on her, but let's see how long it lasts before it gets accidentally tossed in the wash and shrunk...!

Monday, October 25, 2010

New Sweater

I adapted my Honeycomb Waves pattern to make a sweater for little Ginny. I still need to make the sleeves, but it's pretty cute as is, too.


Friday, October 8, 2010

HONEYCOMB WAVES BLANKET: FREE PATTERN!


After months of working on this, it is finally ready to publish! Enjoy.

MATERIALS:
• US 9 (5.5 mm) Needle (I used a 36” circular)
• 7 balls Noro Taiyo (220 yds/ 201.2 m each) or other bulky weight self-striping yarn in an assortment of colors that you like. I used 1 ball of each of the following colors: 5, 6, 11, 14, 15, 17, & 18.
• Tapestry needle & scissors

GAUGE: While gauge is not particularly important for this project, inquiring minds often want to know! My gauge was 3.5 sts per inch in stockinette stitch.

ABBREVIATIONS:
CO: Cast on
BO: Bind off
K: Knit
P: Purl
Sl: Slip stitch

FINISHED MEASUREMENTS:
50” (L) x 45” (W)
Note: This will vary depending on your gauge, desired length, and weight of yarn used.

NOTES:
1)Please read the entire pattern before beginning. The pattern is easily memorized once you get started, but it really helps to take a close look at the pattern notes first.
2)This pattern is comprised of three knitted strips that are later sewn together. If you prefer, you can forgo sewing strips altogether by casting enough sts to create the desired blanket width. However, the contrasting color changes may not be as dramatic unless you can find a yarn with particularly long color changes. As can be seen in my pictures, the Taiyo yarn resulted in a color change approximately every honeycomb repeat (i.e., about every 15-20 rows).
3)The honeycomb pattern is created with multiples of 12 + 3. Each strip has 4 pattern repeats, resulting in (48 + 3) = 51 sts. Out of personal preference and to make sewing up easier, I added an extra 2 sts for selvedge edge sts, resulting in a total of 53 sts for CO.
4)I slipped the first stitch of each row (i.e., the selvedge sts) to create a nice even edge for sewing.
5)See chart below for additional pattern guidance.


HONEYCOMB WAVES PATTERN:

Using Main Color (MC), CO 53.
Row 1: P.
Row 2: K.
Repeat Rows 1 and 2 once.
Row 5: With CC, *K6. With yarn in back, Sl 3. K3*. Repeat ** 3 more times. K3.
Row 6: *P6. With yarn held in front, Sl 3. P3.* Repeat ** 3 more times. P3.
Repeat Rows 5 & 6 two more times.
Row 11: With MC, *K6, P3, K3*. Repeat ** 3 more times. K3.
Row 12: K.
Row 13: P.
Row 14: K.
Row 15: With CC, *With yarn in back, Sl 3, K9*. Repeat ** 3 times. Sl 3.
Row 16: *With yarn in front, Sl 3, P9*. Repeat ** 3 times. Sl 3.
Repeat Rows 15 & 16 two more times.
Row 21 (corrected!): With MC, *P3, K9*. Repeat ** 3 more times. P3.
Row 22: K.
Row 23: P.
Row 24: K.

Repeat Rows 5-24 until desired length is achieved.
BO on right side in purl.
Knit two more strips.
Sew strips together.
If desired, pick up sts along outer selvedge edges and knit 4 rows of reverse stockinette st to match CO and BO rows. This will create a nice edge all around the entire blanket. (I did not do this on my blanket, but it probably would have been nice touch!)

Honeycomb Stitch Pattern Notes:
1)Chart below shows pattern from the RIGHT side. For example, the first 4 rows below show Purl sts. This is to indicate that there should be 4 rows of reverse stockinette stitch showing on the right side.
2)As noted above, the first and last sts in each row are selvedge sts and are NOT shown in the chart below nor in the instructions above. This is because some knitters like to include selvedge sts whereas others prefer not to.
3)The shaded boxes represent the Main Color (MC) yarn, whereas the light colored boxes represent the Contrasting Color (CC).
4)The outlined box below indicates one complete pattern repeat.


A reader requested a picture of the back of the blanket, so here you go! Hopefully, this will help with knowing how to carry the yarn when slipping sts.

Sunday, September 19, 2010

New Pattern Coming Soon!

Almost done with my latest creation... Will post as soon as I get the pieces sewn together and the pattern written up!

Thursday, September 16, 2010

The Joe Biden Hat

I happened to see Joe Biden being interviewed on TV today and it reminded me of something I always meant to blog about but never did.

So, a few years ago, I crocheted this hat for my daughter, Alli.


She wore this hat all the time. One day, she was at some event that then-Senator Biden was at. Of course, being a senator, he was surrounded by all sorts of people who wanted to shake his hand and chat with him, etc., etc.

But, here's where it gets neat: Joe Biden caught sight of Alli's hat from across the room, left the crowd of people, and walked over to speak to her. She came home that night all excited because "Joe Biden liked my hat and said his granddaughter would really love it!"

To this day, I think, no matter your politics, it was pretty cool of the guy to make a little kid feel special in a room full of adult bigwigs... Sadly, the hat itself is now long gone...lost at school a few months later...sigh.

Tuesday, June 29, 2010

UFO Guilt

Lately, as I've been knitting, I've been having this nagging feeling of unease and guilt. Not at all the sort of feelings you want to be having when you are engaged in your favorite craft. In trying to figure out why this was happening, I realized it is because I keep starting new projects while never finishing the old ones.

I took an inventory today to see just how bad things had gotten and realized I have a whopping seven projects on the needles with no end in sight for any of them!!

First up are the Mountain Socks. That project is so old, I don't even know when I started it...which means in truth I equally have no idea when I am going to get around to finishing it!

There's the Brioche Cardi that is a "new" design I am working on. I like the sweater, but I've been laboring over it for months now, trying to get the design just right. Besides, who wants to knit a sweater in the summer? So, I'm taking a break.

Then, there's the Shoe Rug. When we come in from the garage, we have this rug that is just a little bit too thick. So, it always gets caught in the door, which drives me crazy (I know, it's weird, but it bugs me because I always have to straighten it out...) I'm making this Shoe Rug in the hopes that it will work out a bit better. Problem is: I don't think it actually will...hence the hibernation on this project...

Next up, Spiral Rib socks. Gorgeous green yarn from last summer's Sock Summit. I love the yarn, but the socks are too big. Basically, I have just been too lazy to rip out the project (and too horrified at the thought of all that wasted time with those tiny stiches and teensy needles...)

I almost forgot the Lace Ribbon Scarf. That one is curious, because I haven't even *started* that project, but for some reason, my Ravelry project page says I'm at 5%...was that wishful thinking on my part?

Then, there's the Entrelac Scarf... I've always wanted to try Entrelac and my mom bought me some really nice Noro yarn from her LYS. So, I immediately started on that project, but it too is hibernating, only because I got distracted by my next project...

Honeycomb Waves! This is the one that is "most currently"
on the needles, meaning I haven't started a new project since I began that one. (Actually, that's not quite true...I did start and finish a little cozy for my iPod Touch yesterday, but we don't have to dwell on that.) I feel committed to this project, although I know eventually I am going to have to sew the pieces of the blanket together, and darn it -- I am a knitter, not a seamstress, for a reason. I hate to sew!

So, where to go from here? Should I buckle down and actually finish these projects? Should I commit to "no new projects" until the UFOs are completed? Or, should I compromise? Say, one new project for each old one completed??

In the end, I know myself, and I will just continue on my merry way starting new projects when I feel like it and completing my old ones all in good time (or not).

After all, isn't that the point of a hobby? I mean, this isn't my job or anything! No one cares if I finish these things (or not)! How bad is it, when even your hobbies start making you feel guilty??

So, my commitment to myself is: no more guilt over those UnFinished Objects!!

But, I do need to buy some more Ziploc bags to hold them all...

Tuesday, January 5, 2010

Kindle Pocket -- Free Pattern

My husband and daughter got me a Kindle for Christmas! Since my 2 oldest daughters immediately absconded with it to read for the next few days, I figured I'd at least do something Kindle-related. So, I designed a felted Kindle Pocket to protect my new gift.


Materials:
Needles: US 8 / 5.0 mm 16" circulars
Yarn: 1 skein Brown Sheep Lamb's Pride Worsted in Cranberry Swirl (or desired colorway)
One colorful button or set of velcro strips (depending on preferred closure on top)

Gauge: not particularly important since you will carefully felt to size.

FINISHED DIMENSIONS: 6.5" W x 9" L

Abbreviations:
sts: stitches
C8F: Slip first 4 sts to cable needle and hold to front. K next 4 sts, then K 4 sts from cable needle.
K: Knit
P: Purl
BO: Bind off
CO: Cast on

Note: This pattern is for the regular-sized Kindle, not the larger Kindle DX.

KINDLE POCKET
CO 56 sts.

Edging:
Working in round on 16” circs, work 4 rows of garter st. (K one round, P one round, K one round, P one round).

Buttonhole:
(Note: If you prefer to use velcro strips as a closure, you can skip the buttonhole directions, and instead do 2 more rows in the previously established garter st pattern)
K 13 sts. BO 2 sts. Knit 41 sts.
P 13. CO 2 sts. P 41 sts.

Begin cabled front panel:
Rounds 1-2: K8, P2, K8, P2, K around.
Round 3: K8, P2, C8F, P2, K around.
Rounds 4-8: K8, P2, K8, P2, K around.

Repeat 8 rounds 6 more times.

Divide sts onto two needles: 28 sts for front and 28 sts for back (with cabled panel centered in front). Turn inside out so right sides face each other. Using a 3-needle bind off, BO all sts to create flat seam at bottom. (If you don't wish to do a 3-needle BO, you can also use kitchener stitch to graft the two edges, or you can bind off as usual and sew the two edges together.)

Felt lightly or to desired shape and size.
Sew button (and/or velcro strips if preferred).

Friday, September 11, 2009

Lace Swirl (Free Pattern)


An easy quick-to-knit project that is great for someone who wants to try lace for the first time, but doesn't want the commitment of a larger project. The size of the hat can be adjusted by using heavier (i.e., worsted) or lighter (sock) weight yarn in larger or smaller needles.

LACE SWIRL

Materials Used:
Yarn: 150 yards (50 gm) Woolcraft Kids Stuff (or other DK / 8 ply / 11 wpi yarn)
Needles: Size US 6 / 4.0 mm 16” circulars and/or set of 5 US 6 DPNs
Tapestry Needle
Scissors

Size: 2T – small adult* (19-20”)
*Note: Pattern is very stretchy due to brim ribbing. It was made for a 6 yr old, but fit my 2 year old and me equally well.

Gauge: 18 sts and 24 rows = 4”

Abbreviations:
K: Knit
P: Purl
YO: Yarn Over
SKP: Slip (as if to knit), Knit, Pass Slipped St Over
K2tog: Knit 2 together
SSK: Slip (as if to knit), Slip, Knit

Pattern:
Brim:
Using long-tail method (or other loose cast-on) CO 88. Join to work in round.
Work K2,P2 rib for 1.5 in”.

Body:
Work in stockinette stitch (i.e., K all sts) for 1”

Begin Lace pattern as follows:
Round 1: [K3, K2tog, YO, K1, YO, SSK, K3] around.
Round 2 (and all even rounds): K all sts.
Round 3: [K2, K2tog, YO, K3, YO, SSK, K2] around.
Round 5: [K1, K2tog, YO, K5, YO, SSK, K1] around.
Round 7: [K2tog, YO, K7, YO, SSK] around.

Work 1” in stockinette (or until hat measures 5” from beginning or desired depth).
Crown:
Begin Swirl Decreases as follows:
Place marker at beginning of round and every 22 sts thereafter to divide top into 4 equal parts.
K to 1st marker.
[Slip marker. SKP, K to next marker.] Repeat around until 4 sts remain, switching to DPNs as needed.
Place 4 sts on one DPN and work i-cord for 3” or desired length. BO.
Weave in loose ends. Tie in knot.

Saturday, August 8, 2009

Kitchener (Stitches) and Sock Summit

Every now and then, I take a peek at my world map below to see where my blog visitors are coming from. And, I noticed that there is occasionally a visitor from Kitchener, Ontario (it happened again just today). Now, if you are a knitter, you know why this particular visitor always pops out at me...yes, the dreaded Kitchener stitch required to complete a pair of socks. Just when you think you are finally done, you still have that bit of tedium to complete before you can wear and enjoy your socks.

But, in this case, I always like it when the Kitchener visitor pops up on my map, because I like to think of this visitor as happily knitting socks while reading my blog. And, today, it was particularly nice, because I just returned from the Sock Summit in Portland, OR. Imagine an entire convention center filled with nothing but knitters and yarn. Perhaps that isn't your idea of fun, but for me it was seventh heaven.

In actuality, of course, who knows who the Kitchener visitor is or why s/he visits the blog. Perhaps they don't even knit! But, I thought I would dedicate this post to all sock knitters out there...those lucky enough to make it to the Sock Summit, and to those who were with us in thoughts! (Trust me, we bought enough yarn for everyone...)

Monday, June 29, 2009

Swirl


A cute swirly topper for your favorite little one...

SWIRL

Materials Needed:

Size 4 16" circular or DPN needles
1 skein Crystal Palace Yarns Mini Mochi (195.0 yds/178.3 m) Colorway 103
Tapestry needle
Scissors

Abbreviations:
CO: cast on
SKP: Slip 1 as if to knit, Knit 1, Pass slipped stitch over
sts: stitches
PM: place marker

Gauge: 24 sts across 4"

Size: 0-3 mos.
(For toddler size, try a worsted weight yarn with size 6 needles.)

Using long-tail method (or other loose cast-on) CO 88 sts.
Join to work in round. PM to denote beginning of round.

Brim:
*Knit 2 rounds. Purl 3 rounds.*
Repeat 4 more times (or once for each color change, depending on your preference).

Knit in round until hat measures 4" from beginning (or desired depth).

Begin Crown:
Purl 4 rounds.

Divide hat into 4 equal parts by placing marker after every 22 sts.

Begin Swirl Top:
SKP after every marker until 4 sts remain.

Work i-cord for 3 inches. BO and tie in knot at top. Weave in any loose ends.

For an alternate "swirlier" top:
Try dividing top into 8 equal parts, and doing the SKP after each marker. This would result in a rounder swirled hat (more like a soft serve ice cream cone as opposed to the square design currently pictured).

Monday, February 23, 2009

Feather


After asking my kids for advice on what to name this scarf (and discarding suggestions like Tree Top, although that is pictorially fairly accurate), we came up with "Feather". The lace pattern looks like bunches of feathers and the yarn is definitely feather soft. Enjoy!


FEATHER

(Adapted from J. Leinhauser's 101 Ripple Stitches #72)

Materials Needed:

Size 6 needles
1 skein Karabella Yarns Boise (163 yds/50 g.) Color 69. (Mini Mochi would also be nice for this)
Tapestry needle

Abbreviations:
Sl1: Slip 1 as if to knit
K2tog: Knit 2 together
K3tog: Knit 3 together
PSSO: Pass slip stich over
YO: Yarn over

Gauge:
36 sts in pattern = 4"
Row gauge not important.

Finished dimensions: 4" x 39"

Using long-tail method (or other loose cast-on) CO 36 sts.

Seed Stitch Foundation
Work 4 rows of seed stitch as follows:
Row 1: *K1, P1*. Repeat ** across.
Row 2: *P1, K1*. Repeat across.
Row 3-4: Repeat Row 1 and 2.

Scarf Body
Row 1: K1, P1, K1, K1, Sl1, K2tog, PSSO, K9, YO, K1, YO, P2, YO, K1, YO, K9, K3tog, K1, P1, K1, P1 (Note: Be careful to fully wrap the YO before the P2 sts.)

Row 2: P1, K1, P15, K2, P14, K1, P1, K1

Row 3: K1, P1, K1, K1, Sl1, K2tog, PSSO, K8, YO, K1, YO, K1, P2, K1, YO, K1, YO, K8, K3tog, K1, P1, K1, P1

Rows 4, 6, 8, & 10: Repeat Row 2.

Row 5: K1, P1, K1, K1, Sl1, K2tog, PSSO, K7, YO, K1, YO, K2, P2, K2, YO, K1, YO, K7, K3tog, K1, P1, K1, P1

Row 7: K1, P1, K1, K1, Sl1, K2tog, PSSO, K6, YO, K1, YO, K3, P2, K3, YO, K1, YO, K6, K3tog, K1, P1, K1, P1

Row 9: K1, P1, K1, K1, Sl1, K2tog, PSSO, K5, YO, K1, YO, K4, P2, K4, YO, K1, YO, K5, K3tog, K1, P1, K1, P1

Repeat these 10 rows for pattern until desired length is reached. In the pictured scarf, I had 21 pattern repeats.

End with 4 rows of seed stitch, following Foundation pattern above.
BO loosely.

Block lightly to display lace pattern to best effect.

Alternate symmetric pattern: If you prefer a symmetric scarf, work scarf from beginning through 11 pattern repeats ending with Row 9. Place sts on holder. Work second scarf section from beginning through 11 pattern repeats ending with Row 9. Graft together in pattern following Row 10.

Wednesday, February 18, 2009

Victoria

For Christmas, Tim gave me and my parents a surprise trip to Victoria, BC over Valentine's weekend. Now you would expect that we would spend the weekend sightseeing. And we did - here's proof:


But, we also went shopping... We got the kids lots of souvenirs and Tim some organic Guatemalan coffee. But, for me? Yep, you guessed it:


Lots and lots of yarn! There were two fantastic shops in Victoria, but my favorite is the Beehive Wool Shop. It was full of the most wonderful hand-dyed and hand-painted yarns... I could have hung out there all weekend (as it was, I went twice!).

Anyway, it was a fantastic trip - so nice to hang out with my parents. And, Tim even remembered Valentine's Day. When I left to drive up to Seattle to catch the ferry, he slipped me a Butterfinger bar for the road (which I assumed was the only Valentine's gift I would get). But, when we checked into the hotel in BC, there was a huge bouquet of my favorite flowers waiting for us in the room.


And, somehow we even managed to get them through customs, so we continue to enjoy them at home.

I have to say, I must have one of the best husbands in the world.

Sunday, February 8, 2009

Frivol-ous

My first major attempt at an intricate cabled hat. After slowly working on it many a late night, it is finally finished - cable grafting and all. Despite my pleas, the little munchkins kept interrupting me during that important grafting section (which had to be done in daylight hours, trust me). I have to admit I got a teensy bit short with them after the 3rd or 4th time. So, after much whispering amongst them, the totally cute kids put up a sign on the doorway to my knitting room that said “No Entry - Please be quiet. Angry mommy knitting. No disturbance.” Well, after that I didn’t get much done, because we were all laughing too hard…but I did finish it eventually. So, without further ado, here is Frivol (for you non-knitter types, that's actually the name of the pattern...)


I'm now working on writing a pattern for mittens to match the hat. I've test-knit the left one, but am not thrilled with it. The top just isn't right yet.


So, I'll continue to modify it as I knit the right one. (Of course, that does mean I will end up with mis-matched mittens, but who really looks all that closely, right?)

Monday, December 22, 2008

Why 2 Yr Olds Shouldn't Play with Scissors

Were you expecting a picture of Ginny with her hair cut? Nope, although she has done that, too. But, yarn (unlike hair) does not grow back...

Here is the "before" shot of a beautiful scarf I knit for my mother-in-law for Christmas:

dropstitchscarf

And, an "after" shot of some of the million ends just waiting to unravel:

scarf_after

Although my first reaction was utter dismay, my second reaction was "Wow, Ginny has really great manual dexterity!"

Saturday, December 13, 2008

Love this Scarf

I'm not normally a scarf person, but I had the most fun making this Christmas present. Here's hoping the recipient has as much fun wearing it...

IMG_1357

Wednesday, December 10, 2008

Zig Zag Rib - Free Pattern

This started out as a simple diagonal rib scarf for a Christmas present, but when I noticed the colors were coincidentally changing just as the diagonal repeat was ending, I thought I'd see what would happen if I switched directions. Sure enough, the colors for the most part changed with every diagonal change, so the result is a very cool zig zag rib. Enjoy!

IMG_1322

ZIG ZAG RIB

Materials Needed:

Size 9 needles
1 skein Debbie Mumm Traditions (148.73 yds/136m) Pine Needles (Noro Kureyon would also be nice for this)
Tapestry needle
Measuring tape

Gauge (not particularly important, but here are the measurements for the first 16 rows and 24 sts):
24sts = 4.5''
16 rows= 3"

Using long-tail method (or other loose cast-on) CO 24 sts.
(Note: If you prefer a wider scarf, simply CO additional stitches in multiples of 4.)

Zig Zag pattern:

Zigging Right (with RS facing)
Row 1: (K2, P2) across
Row 2: (K2, P2) across
Row 3: K1, (P2, K2) across, ending with P2, K1
Row 4: P1, (K2, P2) across, ending with K2, P1
Row 5: (P2, K2) across
Row 6: (P2, K2) across
Row 7: P1, (K2, P2) across, ending with K2, P1
Row 8: K1, (P2, K2) across, ending with P2, K1
Repeat these 8 rows once.

Zagging Left (with RS facing)
Row 9: (K2, P2) across
Row 10: (K2, P2) across
Row 11: P1, (K2, P2) across, ending with K2, P1
Row 12: K1, (P2, K2) across, ending with P2, K1
Row 13: (P2, K2) across
Row 14: (P2, K2) across
Row 15: K1, (P2, K2) across, ending with P2, K1
Row 16: P1, (K2, P2) across, ending with K2, P1
Repeat these 8 rows once.

Repeat Zigging and Zagging until desired length is reached.

Monday, December 1, 2008

A Few More Hats

After realizing that I could make about 10 hats in the time it takes to make one stinkin' pair of socks (no pun intended), I have been on a hat-making craze for the past few weeks. Here are some of them (in addition to the ones I posted earlier):